Posts

Showing posts from December, 2021

How to Dockerizing LEMP Stack with Docker-Compose

Image
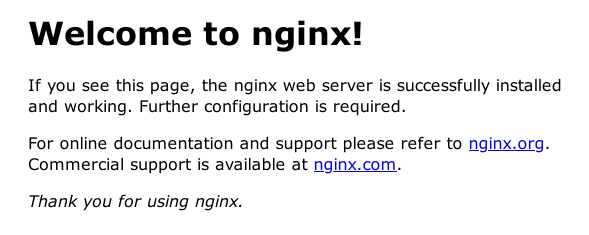
LEMP: Linux, Nginx, PHP, MySQL Nginx Create docker-compose.yml in a directory(lemp) is as follows: version: '3.8' services:   nginx:     image: nginx:1.20.2     ports:       - 80:80 Let's test this out .   $ docker-compose up -d  The -d option indicates that run the containers in the background. It might take a little while as the Nginx image will first be downloaded from Docker Hub. When it is done, open localhost in your browser, which should display Nginx's welcome page: Welcome to nginx! If you see this page, the nginx web server is successfully installed and working. Further configuration is required. For online documentation and support please refer to nginx.org . Commercial support is available at nginx.com . Thank you for using nginx. To stop the container, simply run: $ docker-compose stop  PHP Replace the content of docker-compose.yml with this one: version: '3.8' services:   nginx:     image: nginx:1.20.2     ports:       - 80:80     volumes:
Install Shadowsocks-libev as Client on Debian Linux

Install Shadowsocks-libev # apt-get update # apt-get install shadowsocks-libev # vi /etc/shadowsocks-libev/config.json   {     "server":"server_ip",     "mode":"tcp_only",     "server_port":8888,     "local_port":1080,     "password":"server_password",     "timeout":60,     "method":"aes-256-gcm" }   You need to change server_ip , 8888 , server_password to your owns. Start shadowsocks-libev on boot # cp /lib/systemd/system/shadowsocks-libev-local@.service  /lib/systemd/system/shadowsocks-libev-local.service  # vi /lib/systemd/system/shadowsocks-libev-local.service Modify /lib/systemd/system/shadowsocks-libev-local.service as following: #ExecStart=/usr/bin/ss-local -c /etc/shadowsocks-libev/%i.json ExecStart=/usr/bin/ss-local -c /etc/shadowsocks-libev/config.json Enable shadowsocks-libev.service # systemctl enable shadowsocks-libev-local.service   Start shadowsocks-libev # sys

Use Alibaba Cloud Repository

Alpine OS 配置方法 a. 编辑 /etc/apk/repositories b. 将里面 dl-cdn.alpinelinux.org 的 改成 mirrors.aliyun.com ; 保存退出即可 Docker 用alpine作为基础镜像 在 Dockerfile 运行apk之前要先替换为阿里alpine镜像源如下: # syntax=docker/dockerfile:1 FROM node:12-alpine RUN sed -i 's/dl-cdn.alpinelinux.org/mirrors.aliyun.com/g' /etc/apk/repositories && apk add --no-cache python2 g++ make WORKDIR /app COPY . . RUN yarn install --production CMD ["node", "src/index.js"] npm and yarn 可以在终端或命令提示符或PowerShell里面执行下面的命令设置: npm config set registry https://registry.npm.taobao.org --global npm config set disturl https://npm.taobao.org/dist --global yarn config set registry https://registry.npm.taobao.org --global yarn config set disturl https://npm.taobao.org/dist --global PIP $ pip install scrapy -i https://mirrors.aliyun.com/pypi/simple/ Others

Install LEMP on Ubuntu Linux(20.04)

Image
Install Nginx $ sudo apt update $ sudo apt install nginx  $ sudo service nginx start    * Starting nginx nginx                                                  [ OK ]   Enter Ubuntu Linux ip in the browser for example http://192.168.1.18 , and then: It means nginx is running. Install MySQL $ sudo apt install mysql-server $ sudo service mysql start $ sudo mysql_secure_installation When prompted, type  y , and then ENTER . Check MySQL: $ sudo mysql mysql> Done. Then exit. mysql > exit Install PHP $ sudo apt install php-fpm php-mysql Configuring Nginx to Use the PHP Processor   PHP's configuration $ sudo vim /etc/php/7.4/fpm/pool.d/www.conf    Uncomment the line below, save and quit. listen = /run/php/php7.4-fpm.sock Nginx's configuration $ sudo vim /etc/nginx/sites-enabled/default   Add index.php to  /var/www/html  folder. # Add index.php to the list if you are using PHP index index.php index.html index.htm index.nginx-debian.html;   Uncomment below fastcgi_pass should

Install Debian(11.1.0) Linux VM on FreeBSD(13.0) with grub2-bhyve and ZFS without GUI

Image
Preparing the Host The first step to creating a virtual machine in bhyve is configuring the host system. First, load the bhyve kernel module: # kldload vmm Then, create a tap interface for the network device in the virtual machine to attach to. In order for the network device to participate in the network, also create a bridge interface containing the tap interface and the physical interface as members. In this example, the physical interface is em0 : # ifconfig tap0 create # sysctl net.link.tap.up_on_open=1 net.link.tap.up_on_open: 0 -> 1 # ifconfig bridge0 create # ifconfig bridge0 addm em0 addm tap0 # ifconfig bridge0 up   Creating a Debian Linux Guest with ZFS Using ZFS volumes instead of disk image files can provide significant performance benefits for the guest VMs. A ZFS volume can be created by:   # zfs create -V88G -o volmode=dev zroot/debiandisk0   List ZFS volume disk image files: % zfs list   Destroy A ZFS volume disk image file: #   zfs destroy zroot/debiandisk0 D

Booting bhyve Debian/Ubuntu Linux VM with UEFI Firmware on FreeBSD

Preparing the Host First, load the bhyve kernel module: # kldload vmm   Then, create a tap interface for the network device in the virtual machine to attach to. In order to for the network device to participate in the network, also create a bridge interface containing the tap interface and the physical interface as members. In this example, the physical interface is em0: # ifconfig tap0 create # sysctl net.link.tap.up_on_open=1 net.link.tap.up_on_open: 0 -> 1 # ifconfig bridge0 create # ifconfig bridge0 addm em0 addm tap0 # ifconfig bridge0 up Using ZFS with bhyve Guests A ZFS volume can be created by: # zfs create -V88G -o volmode=dev zroot/linuxdisk0   If you want to destroy ZFS file. # zfs list   For example the ZFS file you want to destroy is  win10disk0: # zfs destroy  zroot/linuxdisk0 Preparing for the Installation Download Debian/Ubuntu Linux iso. Install VNC client # pkg install tightvnc   In order to make use of the UEFI support in bhyve, first obtain the UEFI firmwa

How to verify SHA checksum for FreeBSD ISO file

% shasum -a 256 --ignore-missing -c CHECKSUM.SHA256-FreeBSD-13.0-RELEASE-amd64 -a : Algorithm to use. For example, 1 (default), 224, 256, 384, 512, 512224, 512256 -c : Read SHA sums from the FILEs and check them --ignore-missing : Do not fail or report status for missing files.  

Common Commands in Docker

Pull a image from Docker Hub $ sudo docker pull fhsinchy/hello-dock Run a container: $ sudo docker container run -d -p 8080:80 fhsinchy/hello-dock -p  --publish it meant any request sent to port 8080 of your host system will be forwarded to port 80 inside the container. -d  --detach  keep a container running in background. List containers: $ sudo docker container ls         # List containers that are running. $ sudo docker container ls --all   # List all containers include those are Exited.   How to name or rename a container:  $ sudo docker container run --detach --publish 8888:80 --name hello-dock-container fhsinchy/hello-dock $ sudo docker container rename gifted_sammet hello-dock-container-2 How to stop or kill a running container: $ sudo docker container stop <container identifier> Where container identifier can either be the id or the name of the container. $ sudo docker container stop hell-dock-container How to restart a container: $ sudo docker container start <cont

Linux或Unix中libreoffice无法输入中文

 Linux或Unix中libreoffice无法输入中文,怎么办? 我的解决办法,使用apache-openoffice替代. 我以FreeBSD为例子: # pkg install apache-openoffice 搞定.

How to list containers in Docker

To show only running containers use the given command: docker ps To show all containers use the given command: docker ps -a To show the latest created container (includes all states) use the given command: docker ps -l To show n last created containers (includes all states) use the given command: docker ps -n=-1 To display total file sizes use the given command: docker ps -s The content presented above is from docker.com. In the new version of Docker, commands are updated, and some management commands are added: docker container ls It is used to list all the running containers. docker container ls -a And then, if you want to clean them all, docker rm $(docker ps -aq) It is used to list all the containers created irrespective of its state. And to stop all the Docker containers (force) docker rm -f $(docker ps -a -q)   Here the container is the management command.

BdsDex: failed to load Boot0001 "UEFI BHYVE SATA DISK BHYVE-OABE-20A5-E582" from PciRoot(0x0)/Pci (0x2, 0x0)/Stat(0x0,0xFFFF,0x0) : Not Found

Image
When you start Debian Linux after you installed Debian with UEFI bhyve on FreeBSD and rebooted FreeBSD, you will get the error message as follows: BdsDex: failed to load Boot0001 "UEFI BHYVE SATA DISK BHYVE-OABE-20A5-E582" from PciRoot(0x0)/Pci (0x2, 0x0)/Stat(0x0,0xFFFF,0x0) : Not Found   Description It will try other way to start system, but it will failed finally. At the last, it will come to UEFI  Shell . How to access the Debian Guest VM? 1. Enter exit get out of the UEFI Shell (you will come to BHYVE panel) 2. Choose Boot Maintenance Manager 3. (In the Boot Maintenace Manager ) Choose Boot From File 4. (In File Explorer) NO VOLUME LABEL, [PciRoot(0x0)/ Pci()]  press Enter 5. (Still in the File Explorer) Choose <EFI> 6. (Still in the File Explorer) Choose debian   7. (Still in the File Explorer) Choose grubx64.efi 8. Then you will get into the system How can you fix it: 1) Get access inside your Debian Guest VM. 2) as root: cd /boot/efi/ 3) mkdir -p EFI/BOOT

Packing Instruction tar

tar [-z|-j|-J] [-c|-t|-x] -v [-f new_filename] filename. -c      Create a new archive containing the specified items. -t      List archive contents to stdout.  The long option form is --list. -x      Extract to disk from the archive.   -f       file , --file file             Read the archive from or write the archive to the specified file.    -J ,     --xz             (c mode only) Compress the resulting archive with xz(1). -j ,     --bzip, --bzip2, --bunzip2              (c mode only) Compress the resulting archive with bzip2(1). -z ,    --gunzip, --gzip             (c mode only) Compress the resulting archive with gzip(1). -k ,    --keep-old-files              (x mode only) Do not overwrite existing files. -v ,    --verbose              Produce verbose output.   Others -p ,      --insecure, --preserve-permissions             (x mode only) Preserve file permissions. -P ,      --absolute-paths              Preserve pathnames. --exclude pattern              Do not process files or di

Commond Commands in Vim command-line Mode

Image
Edit binary, image and others files in hexadecimal and save the changes: :%!xxd   :    Enter command-line mode. %   Matches the whole file as a range.  !    Filters that range through an external command.  xxd   is the external shell command.   The hexadecimal part on the left side of editing is valid, and the text part on the right side of editing is invalid. Save the changes(take gif file as an example): :%!xxd -r > 1_changed.gif